Setup Guide
TimeOpera App – Prerequisites & Setup Guide
Follow these straightforward steps to deploy and configure TimeOpera in your Microsoft 365 tenant. The setup covers deploying the app package, approving Graph API permissions, completing onboarding, and integrating with your SharePoint site.
1. SharePoint Site Setup

- Open https://admin.cloud.microsoft
- Select SharePoint Admin centers
- Ensure the target SharePoint site (sites/TimeOpera) is available; if not, create it.
2. Configure Shared Mailbox
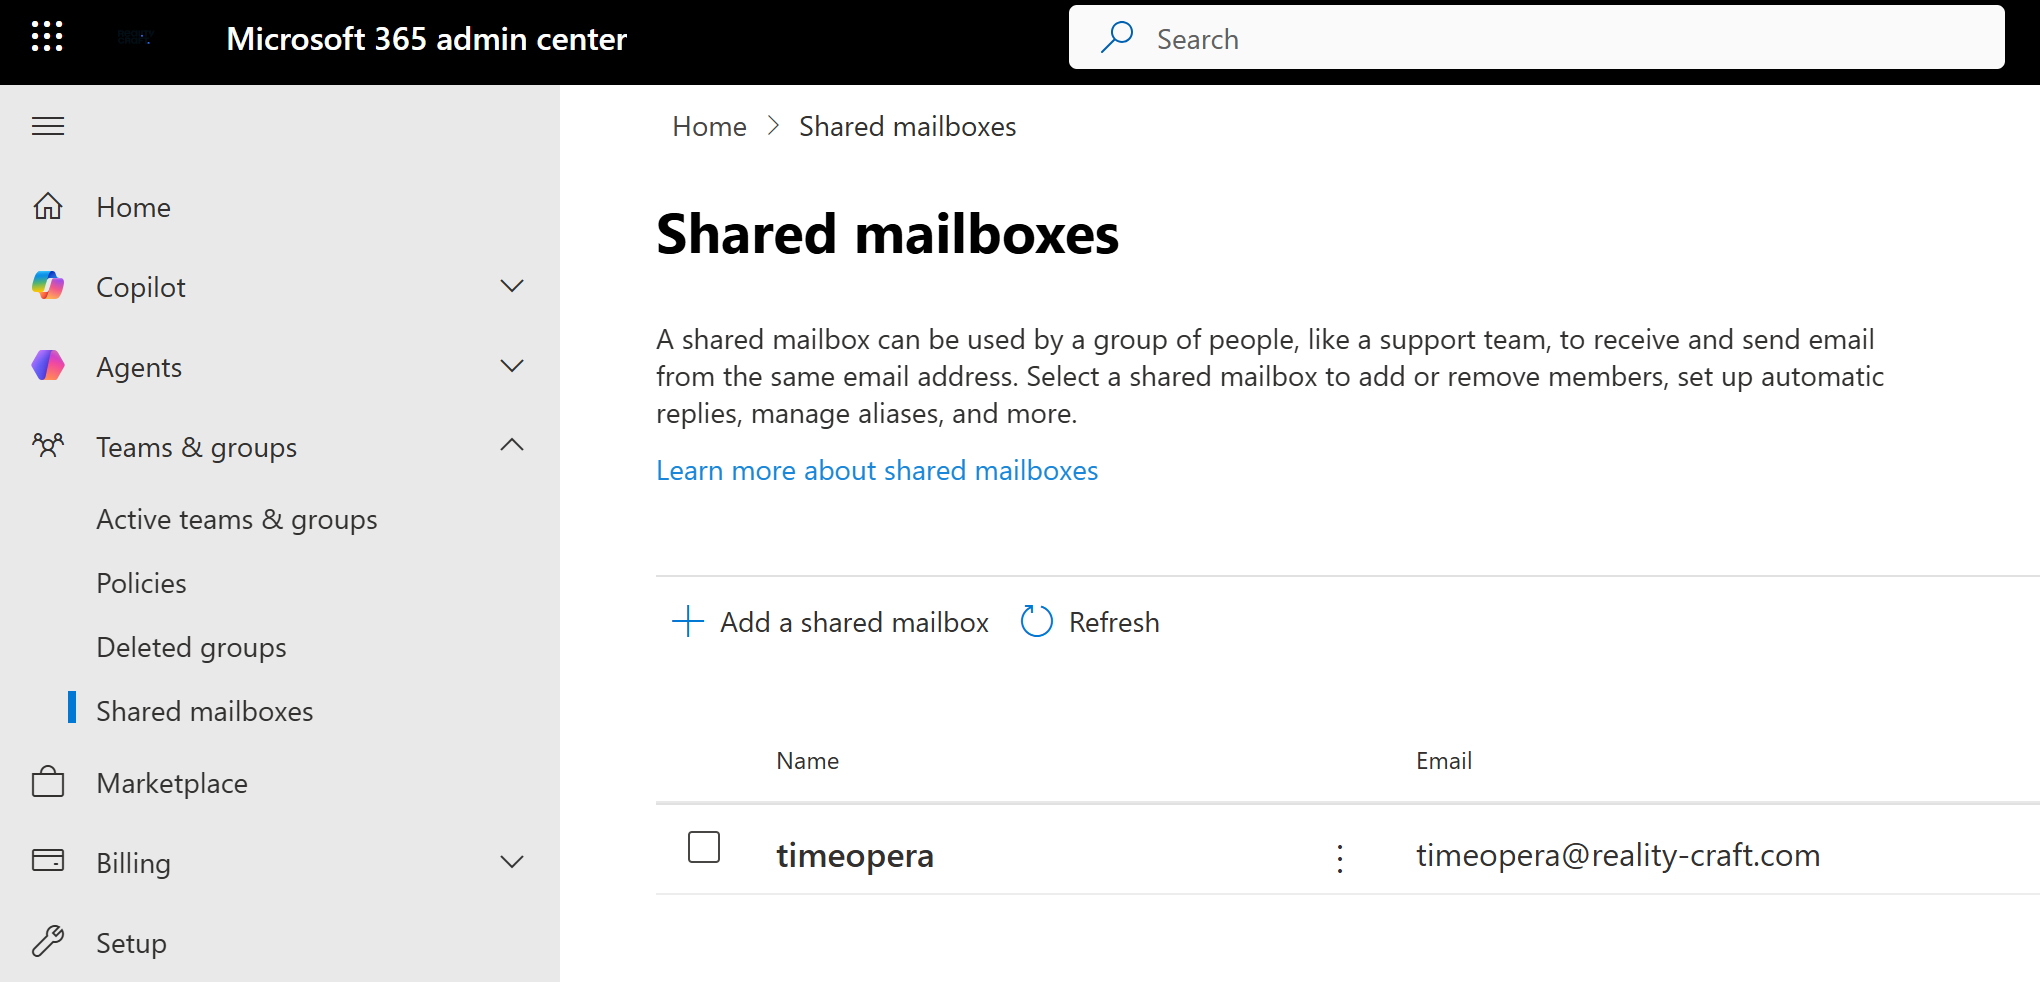
- Open https://admin.cloud.microsoft
- Create an Shared Mailbox in Microsoft 365 (TimeOpera@yourdomain.com)
- This mailbox will be used for sending application emails.
3. Upload Solution to App Catalog
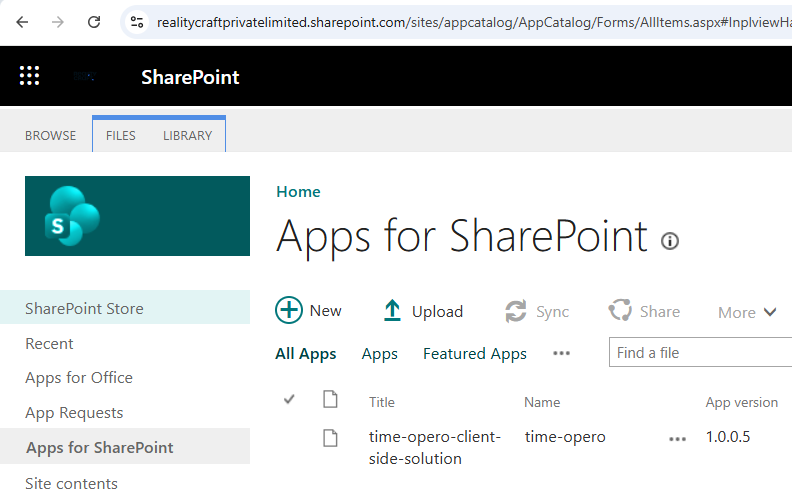
- Navigate to SharePoint Admin Center → More Features → Apps → Apps for SharePoint
- Upload the .sppkg file
- Click Deploy and make it available to all sites (if required)
3.1 Approve API Permissions (Microsoft Graph)
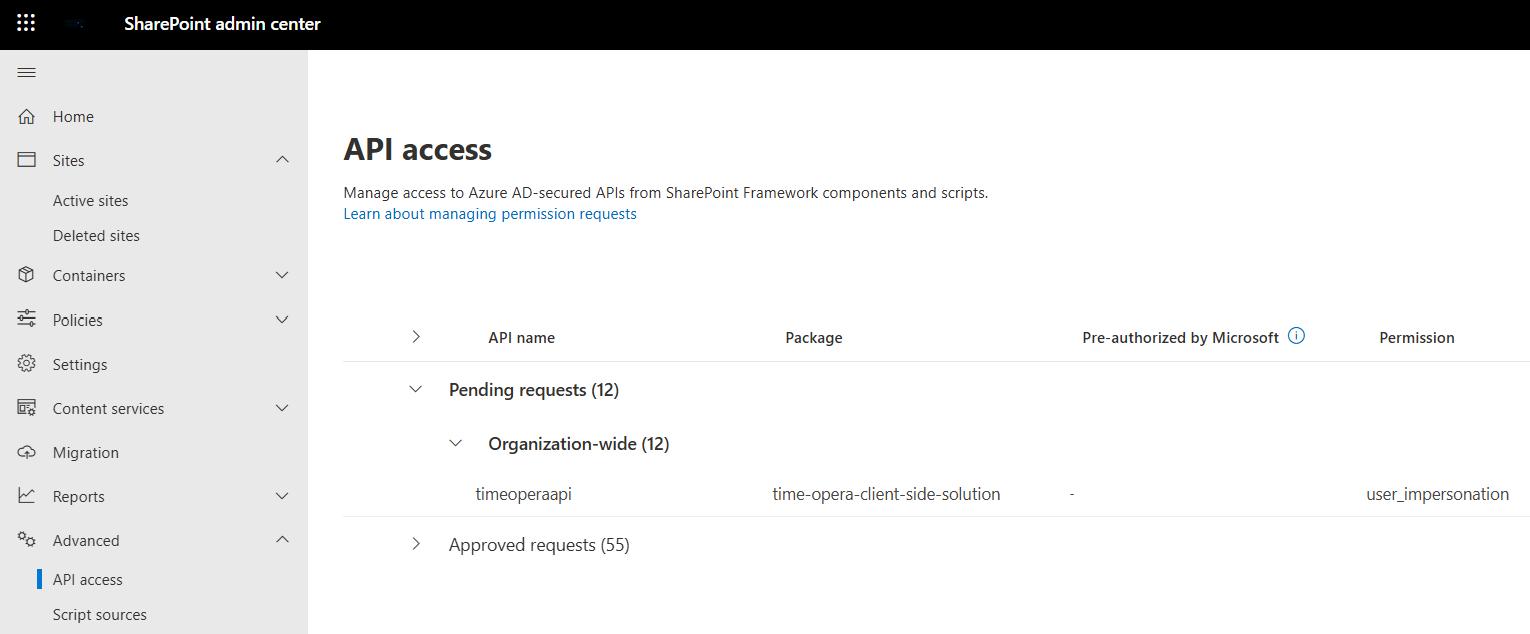
- Go to SharePoint Admin Center → API Access
- Review the pending permission requests
- Approve all required Microsoft Graph permissions
About user_impersonation
It allows an application to act on behalf of the signed-in user and access Microsoft Graph with that user’s permissions.
⚠️ Admin approval is mandatory for the application to function properly
4. Complete Application Onboarding
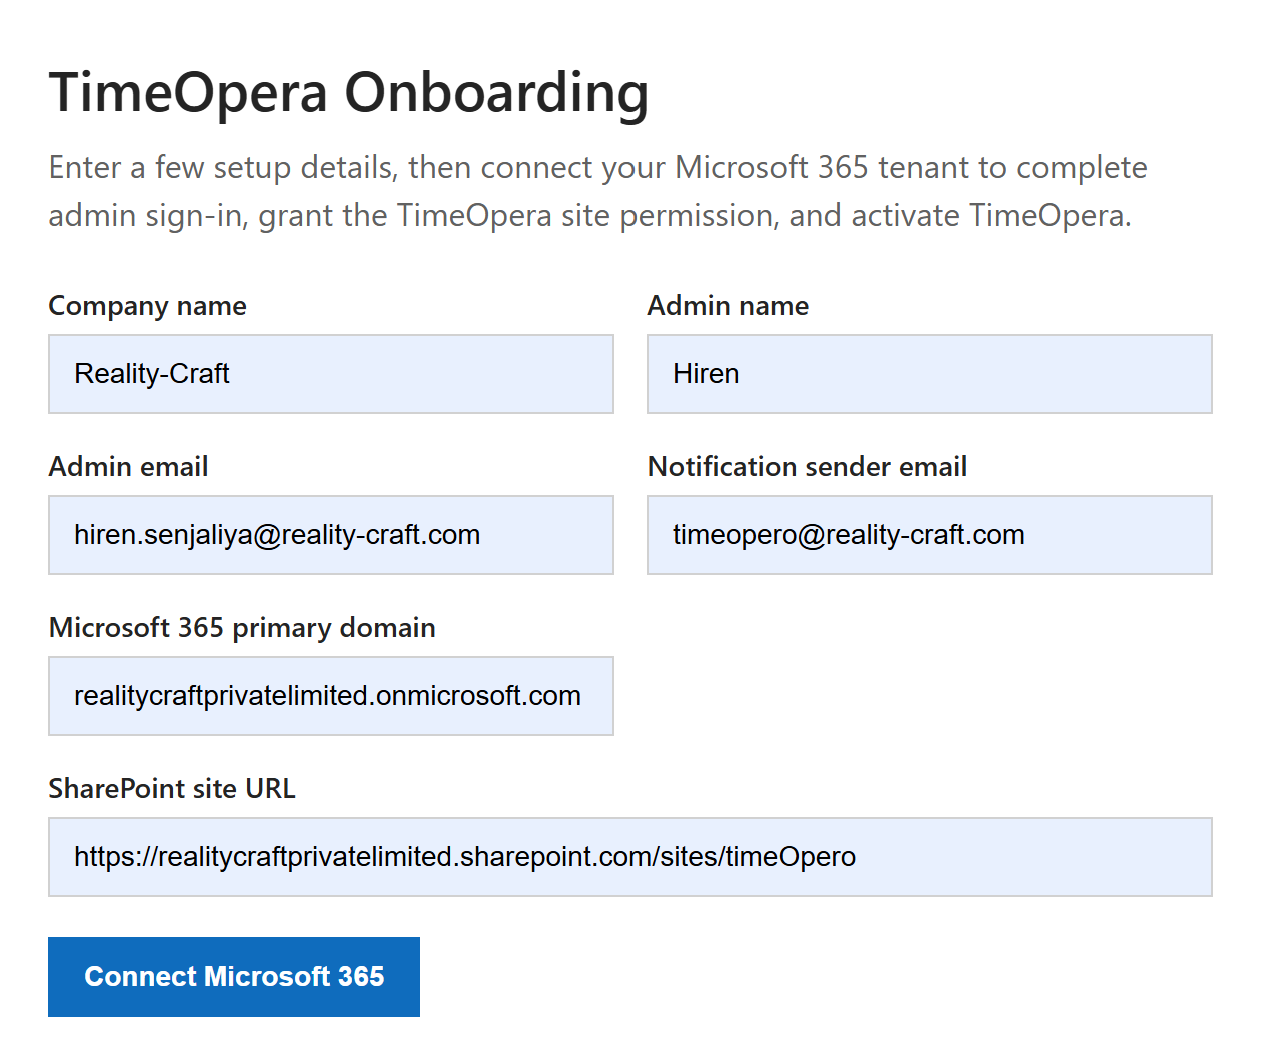
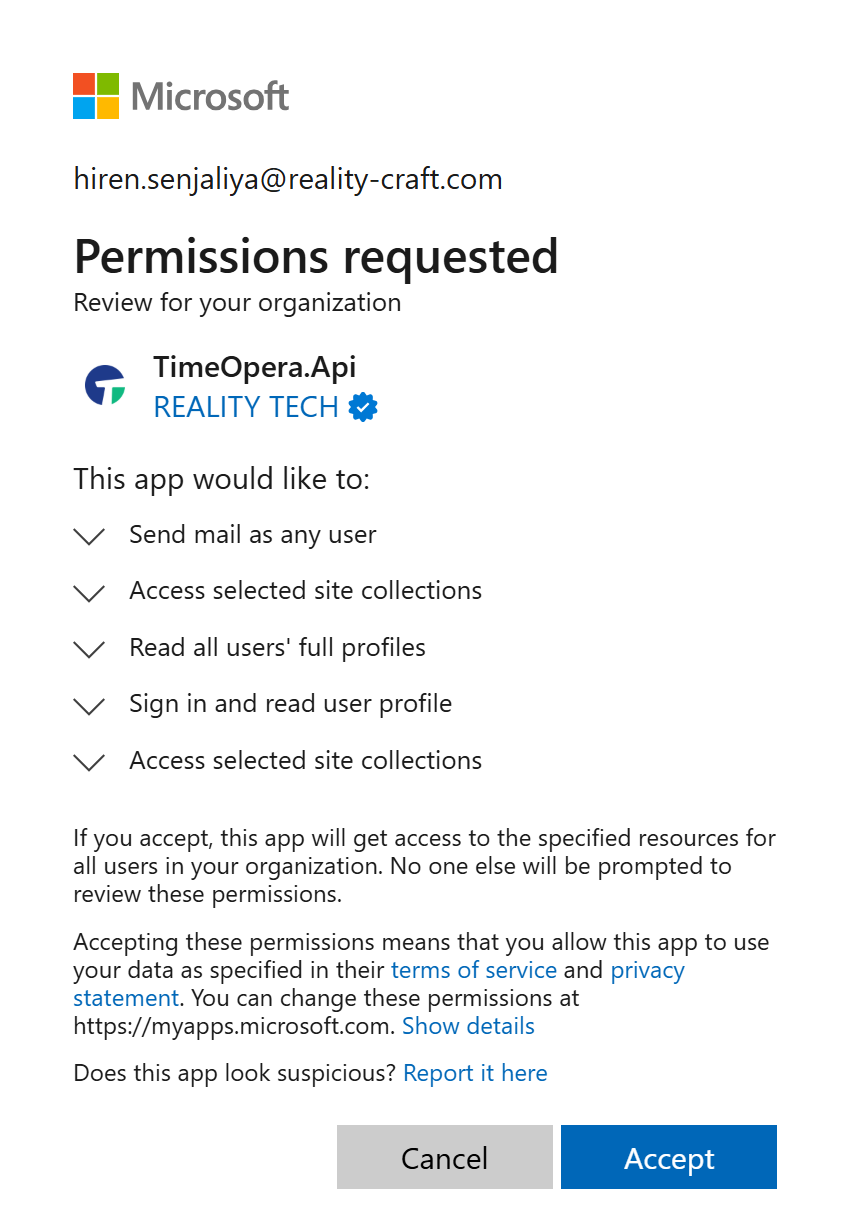
- Open the onboarding link
- Fill in the required setup details
- Click Connect to Microsoft 365
- Sign in with your Microsoft account
- A SharePoint Administrator account is recommended for a smooth setup
- Review the permission request and click Accept
Why These Permissions Are Required
During setup, TimeOpera may request Full Control of all site collections temporarily so it can automatically create and configure the dedicated TimeOpera SharePoint site, apply the required structure, lists, and permissions, and complete setup without errors or repeated admin intervention.
What Happens After Setup
Dedicated site operation
Once setup is complete, TimeOpera is designed to work only with the dedicated TimeOpera SharePoint site.
Review and restrict access
You can review access after onboarding and restrict the app to this specific site.
Temporary elevated permission
Broader permissions such as Full Control can be removed after setup is completed.
Data and access assurance
TimeOpera does not access other SharePoint sites, does not store your data externally, keeps data within your Microsoft 365 environment, and operates only within the configured TimeOpera site.
Support
If you face any issues during setup, review the steps above and confirm the required Microsoft 365 permissions and setup values before retrying.